Buttered Stuffing With Celery and Leeks

Servings: 8-10
Preheat: 375
Prep Time: 1 1/4 hours, plus overnight drying
Source: ALISON ROMAN – New York Times; https://cooking.nytimes.com/recipes/1020600-buttered-stuffing-with-celery-and-leeks

Those of you who love stuffing know that it might be the only reason to host Thanksgiving. This version is an updated classic — no dried fruit, no surprise ingredients, no “twists” — just a very buttery, deeply savory stuffing made with garlic, leeks and a lot of celery. The bread is crusty and torn, never cubed (for those crisp, craggy edges), and the whole thing is baked in a baking dish, never inside the turkey (to keep it light and fluffy with a custardy interior and a golden-brown top). All stuffing needs two trips to the oven: once, covered, to cook it through and twice, uncovered, to crisp up the top. You can do the first bake ahead of time if you like, or do one after the other if the timing works out that way.

Ingredients: 

1 large loaf good, crusty bread, preferably sourdough or ciabatta (about 1¼ pounds)
¼ cup olive oil
8 tablespoons unsalted butter
6 garlic cloves, thinly sliced
2 large leeks, white and light green parts, chopped
Kosher salt and freshly ground black pepper
6 celery stalks, thinly sliced, leaves reserved for garnish if available
½ cup dry white wine
½ teaspoon red-pepper flakes (optional)
2 ½ cups low-sodium chicken, turkey or vegetable broth
3 large eggs
½ cup finely chopped parsley
¼ cup finely chopped chives
2 tablespoons finely chopped marjoram, oregano or thyme

Directions: 

Using your hands, tear bread, crust and all, into 1 1/2- to 2-inch pieces. (Alternatively, you can cut the bread with a knife, but I prefer the way the craggy bits toast and soak up the goods.) Place chunks on a rimmed baking sheet, and let sit uncovered at room temperature for 12 to 24 hours. If you’re short on time, you can toast the chunks in a 300-degree oven instead, tossing occasionally, until lightly crisped, but not browned, on the outside.

Heat oven to 375 degrees. In a large skillet over medium-high heat, combine olive oil and 4 tablespoons butter. Once butter has melted, add the garlic and leeks. Season with salt and pepper and cook, stirring occasionally, until leeks are bright green and totally softened, 8 to 10 minutes.

Add celery, and season with salt and pepper. Cook, stirring occasionally until bright green and tender, 4 to 6 minutes. Add white wine, and cook until reduced by about three-quarters, 3 to 4 minutes. Add red-pepper flakes, if using, and remove from heat.

Whisk together broth and eggs in a medium bowl. Place bread in a large bowl (you want a lot of room for mixing, so go big), and add the leek and celery mixture, parsley, chives and marjoram. Stir to coat so that everything is evenly distributed, trying not to totally crush the bread. Pour the egg mixture over everything and toss a few times. Let sit a minute or two and give another toss. Repeat twice until all the liquid has absorbed and evenly distributed to each and every piece of bread.

Transfer mixture to a 2 1/2- to 3-quart baking dish (a 9-by-13 pan also works), making sure not to pack it too tightly. (You want to keep the bread in the stuffing as light as possible.) Dot the top with the remaining 4 tablespoons butter, making sure to pay extra attention to the corners, where the stuffing will get the crispiest.

Cover with foil and bake until the stuffing is sizzling at the edges and completely cooked through, 25 to 30 minutes. If it’s not yet time to serve, remove stuffing from oven and set aside. (If you are nearly ready to serve, proceed directly to the next step and continue without pausing.)

When ready to serve, remove foil and increase temperature to 425 degrees. Bake stuffing until crispy, crunchy and impossibly golden brown on top, 20 to 25 minutes. Scatter with celery leaves, if using, and serve.

Brown turkey gravy

Servings: 1 quart
Preheat: 0
Prep Time: 30 minutes, 2 hours total
Source: Brendan Webster

After the turkey, it’s the gravy that makes the Thanksgiving dinner. While the turkey cools down, you prepare this finale, piping hot, flavorful, and in abundance. Make a well in each serving of mashed potatoes with the ladle full of gravy, spoon it over the turkey, stuffing and wild rice.

You can make your turkey gravy stock way ahead of time. When the turkey is done and the roaster de-greased, blend the gravy stock into the roasting juices.

Ingredients: 

For the brown turkey stock:

The turkey giblets (neck, heart, gizzard)
4 tbs cooking oil
2 C each chopped onion and carrots
1 C dry white wine or 2/3 C dry white French vermouth
2 C chicken stock or canned broth
Water as needed
Salt
1 bay leaf
1/2 tsp dried, or 1 tbs chopped fresh, thyme and sage

Finishing the gravy:
(These are approximate amounts)
1/2 C of the liquid fat from the turkey
1/2-3/4 C flour
All of the juices from the turkey pan, poured through a gravy separator; set the fat and juices aside in separate bowls
The giblet stock
The coagulated juices from the turkey (these will remain in the roasting pan which you will use for preparing the gravy)

Directions: 

For the stock:

Chop the neck into 2-inch pieces, quarter the gizzard, and halve the heart. Dry in paper towels. Heat oil in a heavy 3-qt saucepan, stir in the giblets and brown them rapidly on all sides, regulating heat so oil does not burn. Remove giblets and stir in the vegetables; cover and cook slowly 5-8 minutes until tender. Then uncover, raise heat, and brown lightly for several minutes. Return giblets to pan, add wine, stock, and enough water to cover ingredients by an inch. Salt lightly, add herbs, and simmer partially covered for 21/2 to 3 hours. Strain, pressing the juices out of the vegetables. Taste for seasoning.

Finishing the gravy:

Pour the fat into the roasting pan. Tipping the pan slightly so that the fat is toward you, scoop 1/3 of the flour into the pan above the fat. Work the flour into the fat, a bit at a time, while also scraping the pan drippings into the resulting roux. When all the flour has been incorporated into the fat, you will have a thick brown roux. Cook this carefully for a couple of minutes, then turn the heat off, and gradually add the drippings (juices) from the turkey. You will have a very thick sauce to which you add your giblet stock a cup at a time with the heat turned to low. Keep adding stock, thinning your gravy until it is the consistency you like. Turn your heat down very low as you carve the turkey. When you are ready to serve, check for consistency, adding as much stock as the roux will bear so that you will have as much gravy as you need.

Pour the gravy into gravy boats for the table.

Blueberry buttermilk scones

Servings: 9 or 10 scones
Preheat: 350
Prep Time: 30 min
Source: Huckleberry

These scones taste traditional in every sense. The problem with most blueberry scones is they have been overmixed – the blueberries get smashed and result is a very off-putting grayish-blue dough. I avoid this problem by mixing the dough almost completely without the blueberries and then rolling them in, like you would a cinnamon roll, at the very last minute. These steps will leave you with a much cleaner-looking pastry. You can also make great lemon buttermilk scones with this recipe; just omit the blueberries and add the zest of three more lemons. I love to serve these scones with very lightly sweetened whipped cream or fresh-made jam, honey, or maple syrup.

Ingredients: 

3¼ cups + 2 tablespoons (420 grams) plain flour
½ cup + 2 tablespoons (130 grams) granulated sugar, plus more for sprinkling
¼ cup (55 grams) brown sugar
1 tablespoon baking powder
1 teaspoon baking soda
1 1/4 teaspoon kosher salt
1 cup (230 grams) cold unsalted butter, cut into 1/2-in cubes
¾ cup (180 ml) buttermilk
zest of 1 lemon
1½ cups fresh blueberries
Egg wash – 2 egg yolks and 2 tablespoons cream whisked together

Directions: 

In a very large bowl, combine the flour, granulated sugar, brown sugar, baking powder, baking soda, and salt. Throw in the butter and work with your fingertips until the pieces are pea-and-lima bean-size. Add the buttermilk and lemon zest. Lightly toss to distribute.

Immediately dump everything onto a clean surface with more than enough space to work the dough. Using only the heel of your palm, quickly flatten the dough. Gather the dough back together in a mound and repeat. After two or three repetitions, the dough should begin holding together. Don’t overwork the dough, it should still be quite crumbly – this is what creates the most luscious short buttery scones ever.

Pat down the dough to a 3/4-in/2cm thickness , about a 9-by-12-in/23-by-30.5cm slab and spread the frozen blueberries evenly on the top. Roll the long side of the dough, like a jelly roll, into a log with the blueberries enveloped inside. Shape the dough into a 12-in-/30.5-cm-long cylinder. Lightly flatten the top so that it is a little less than 1/2in/12 mm thick and cut out nine or ten triangles. Transfer them to an ungreased sheet pan and freeze for at least 2 hours before baking, or up to 1 month, tightly wrapped.

Preheat your oven to 350F/180C. Remove the scones from the freezer. Space them with plenty of breathing room on two ungreased sheet pans, brush with the egg wash, and sprinkle liberally with granulated sugar. Bake from frozen until cooked through, nicely browned, and easily lifted off the pan, about 25 minutes.

Cream Biscuits

Servings: 9 biscuits
Preheat: 425
Prep Time: 20 minutes
Source: https://smittenkitchen.com/2009/12/cream-biscuits; Adapted from James Beard’s American Cookery

Because they’re so easy, it might feel like you are cheating: Five ingredients. A sifter, a mixing bowl and a puddle of melted butter. (That’s so going to be my first album title, I’ve decided.) Three minutes to assemble and twelve minutes to bake. And they remain the richest, lightest biscuits I’ve ever had, with serious plushness within and the faintest crunch at the edges, which sound as you tear one open as if you’d broken a cookie in half but then turned the volume on that sound way down. Or, uh, a very faint crunch. And here’s the thing with biscuits (and scones, for that matter) — they’re the best when you’ve first baked them. Sure, I tried a stale one 24 hours later (for research, people, of course) and it wasn’t so bad but I chalk that up to them being extra-awesome from the get-go. But you don’t need to make them at the 11th hour, biscuits freeze excellently unbaked. Go ahead and make them whenever you have time, flash freeze them and store them in a freezer bag for a later day or freeze them right on your buttered or parchment-lined baking sheet so they’re ready to go when you are. You can bake them still frozen, they’ll just need an extra few minutes in the oven. And then you never have an excuse not to have freshly baked biscuits on the ready.

The original recipe has you brush your baking sheet with melted butter (and increases the amount by two tablespoons) but for whatever reason, the butter not covered by biscuits just got smoky in my oven so I’m voting for you to just line your sheets with parchment. If you find dipping the biscuits in butter difficult (hard to grasp if the dough is soft), just brush them generously instead.

Ingredients: 

3 tablespoons (45 grams) melted butter
2 cups (250 grams) all-purpose flour, plus more for dusting the surface
1 tablespoon (15 grams) baking powder
1/2 teaspoon salt
1 tablespoon (15 grams) sugar (optional)
1 1/2 cups (355 ml) heavy cream

Directions: 

Preheat the oven to 425°F. Line a baking sheet with parchment paper. Melt butter in a small pot or microwave dish, and set aside. Sift two cups flour, the baking powder, salt and (if using) sugar into a large bowl. Fold in 1 1/4 cups cream. If the dough is not soft or easily handled, fold in the remaining 1/4 cup cream, little by little. (I ended up using two additional tablespoons, or half the unused cream.)

Turn dough onto a floured surface, mound it into a ball and, using your hands, press it to a thickness of about 3/4 inch. Cut into rounds, 2 1/2 inches in diameter. Gather dough scraps and continue to make rounds. Dip the top of each round in melted butter and arrange on the baking sheet. Bake until golden, 12 to 15 minutes. Serve immediately, or flash freeze for future use. [Biscuits can be baked straight from the freezer, and additional few minutes baking time will be needed, usually around 3 to 5.

Slow-Roasted Oregano Chicken With Buttered Tomatoes

Servings: 4 to 6
Preheat: 325
Prep Time: 
Source: ALISON ROMAN – New York Times

There are about a million ways to roast a chicken, and people will always tell you that theirs is the best way. Here is the truth: If you smear a good, high-quality chicken with enough fat, season it with plenty of salt and roast it until the skin is brown, it will always be excellent. But it’s slow-roasting that gives you golden skin, tender meat and plenty of salty, savory chicken juices to serve as a sauce. From the simple assortment of ingredients to the ridiculously hands-off preparation, this recipe from Alison Roman’s cookbook “Nothing Fancy” (Clarkson Potter, 2019) is casual in a way that feels almost lazy (but isn’t), with make-sounds-after-you-take-a-bite levels of deliciousness. To truly put it over the top, add a few anchovies to the tomatoes.

Ingredients: 

1 (3 1/2- to 4-pound) whole chicken
Kosher salt and freshly ground black pepper
¼ cup olive oil
1 ½ tablespoons fennel seeds, crushed in a mortar and pestle or spice mill, or chopped with a knife
1 bunch fresh oregano
1 ½ pounds small vine-ripened tomatoes (about 6), halved lengthwise
2 heads of garlic, halved crosswise (it’s fine to leave the skin on)
2 tablespoons unsalted butter, cut into pieces
2 tablespoons red wine vinegar or white wine vinegar
4 to 6 (1-inch-thick) slices of good country bread, such as country loaf or sourdough, toasted (optional)

Directions: 

Heat the oven to 325 degrees. Season the chicken with salt and pepper. (If you can do this in advance, please do.) Drizzle it with the olive oil and sprinkle with the fennel seeds.

Stuff the cavity with half the oregano and place in a large baking dish. Scatter the tomatoes, garlic, butter and remaining oregano around the chicken. Roast until the chicken is golden brown and completely cooked through, and the tomatoes are nice and jammy, 2 1/2 to 3 hours.

Add the vinegar to the tomatoes and let the chicken rest in the baking dish for 10 minutes.

Place toast, if using, on serving platter and spoon the jammy tomatoes over or around the toast. Carve the chicken and place on top of the toast to catch the juices.

Classic Bruschetta

Servings: 15 for appetizers
Preheat: 400
Prep Time: 45 min
Source: Delish

Nothing screams summer quite like bruschetta. Toasted bread gets rubbed with garlic (don’t skip it, it’s the best part) and topped with simply marinated tomatoes. The brighter and juicier your tomatoes, the better your bruschetta will be. Great for picnics

Ingredients: 

FOR THE TOMATOES
4 tbsp. extra-virgin olive oil
2 cloves garlic, thinly sliced
4 large tomatoes, diced
1/4 c. thinly sliced basil
2 tbsp. balsamic vinegar
1 tsp. kosher salt
Pinch of crushed red pepper flakes

FOR THE BREAD
1 large baguette, sliced ¼” thick on the bias
Extra-virgin olive oil, for brushing
2 cloves garlic, halved

Directions: 

Make marinated tomatoes: Preheat oven to 400°. In a medium skillet over medium-low heat, heat oil. Add garlic and cook until lightly golden, 2 to 4 minutes, then remove from heat and let cool.

In a large bowl, toss together tomatoes, basil, vinegar, salt, and red pepper flakes. Add garlic and oil and toss to combine. Let marinate for 30 minutes.

Meanwhile, toast bread: Brush bread on both sides lightly with oil and place on large baking sheet. Toast bread until golden, 10 to 15 minutes, turning halfway through. Let bread cool for 5 minutes, then rub tops of bread with halved garlic cloves.

Spoon tomatoes on top of bread just before serving. Drain liquid from tomatoes before applying to bread

crostata di Ricotta

Servings: 12
Preheat: 400
Prep Time: 1 hours
Source: Sullivan Street Bakery Cookbook

Ingredients: 

For the crust
Crostata Inegrali (Tart Crust with Whole Wheat)
(Makes one 10-inch tart crust)

200 grams (1 1/4 cups plus 2 tablespoons unbleached all-purpose flour)
40 grams (1/4 cup) whole wheat flour
2 grams (1/2 teaspoon) baking powder
3 grams (1/2 teaspoon) fine sea salt
168 grams (1 1/2 sticks/12 tablespoons) unsalted butter at room temperature
175 grams (3/4 cup plus 1 tablespoon) sugar
1 large egg
1 egg yolk
1 teaspoon finely grated lemon zest
4 grams (1/2 teaspoon) vanilla extract

For the Filling:

425 g (scant 2 cups) whole milk ricotta
75 g (1/3 cup) sugar
1 egg
4g (1 teaspoon) dark rum
4g (1 teaspoon) vanilla extract
50g (1/3 cup) mini semisweet chocolate chips
50g (2 Tablespoons) candied orange peel, cut into small pieces

Directions: 

Combine the flours, baking powder, and salt in a small bowl and set aside.

Place the butter, sugar, egg, egg yolk, lemon zest, and vanilla in a bowl of a stand mixer fitted with the paddle attachment. Mix on low speed for 5 to 7 minutes, stopping midway through to scrape down the bowl. Add the dry ingredients and gradually bring the mixer to medium speed for 1 minute

Turn the dough out onto a piece of plastic wrap and pat into a 1/2-inch-thick disk. Cover tightly and let rest in the refrigerator for at least 1 hour and as long as 8 hours. When ready to roll out the dough, allow it to sit unwrapped for a few minutes at room temperature, until slightly pliable.

Preheat the oven to 400 degrees F

Whisk the ricotta, sugar, egg, rum and vanilla together in a medium bowl until well combined. Stir in the chocolate chips and orange peel. Set aside.

For the pastry: Combine the flours, baking powder and salt in a small bowl. Set aside.

In a stand mixer with a paddle attachment, mix the butter, sugar, egg, egg yolk, zest and vanilla on low for 5-7 minutes, scraping often.

Add the dry ingredients and gradually bring the mixer to medium speed for 1 minute.

Turn the dough onto a piece of plastic wrap and pat into a 1/2 inch thick disk. Cover tightly and let rest in the refrigerator for at least 1 hour and as long as 8 hours. When ready to roll out the dough, allow it to sit unwrapped for a few minutes at room temperature, until slightly pliable.

When dough is ready, dust a work surface with flour and roll the dough to about 1/4 inch thick. Gently press the dough into the bottom and sides of a 10-inch tart pan with a removable bottom.

Spread the ricotta filling into the crust. Take extra trimming from the dough and place in strips on top of the topping in a criss-cross pattern.

Bake the crostata for 35 minutes or until the top has puffed up and browned up nicely. Cool the crostata in the pan on a wire rack for 5 minutes. Remove from the outer ring and continue to cool on the rack. Best served slightly warm while the chocolate is gooey.

Ricotta and Roasted Tomato Bruschetta with Pancetta

Servings: 8
Preheat: 325
Prep Time: 15
Source: https://www.foodandwine.com/recipes/ricotta-and-roasted-tomato-bruschetta-pancetta

Peak-season tomatoes make all the difference in this simple bruschetta from author Susan Spungen. They’re the perfect accompaniment to a bowl of soup or a large salad, or, to turn them into two-bite hors d’oeuvres, simply cut the bruschetta crosswise into strips.

Also check out https://www.foodandwine.com/slideshows/bruschetta-and-crostini for other recipes.

Ingredients: 

10 ounces multicolored cherry tomatoes
2 garlic cloves, thickly sliced
5 tablespoons extra-virgin olive oil, plus more for drizzling
Kosher salt Pepper
4 thin slices of pancetta
32 sage leaves
1 pound fresh ricotta cheese
8 slices of country bread, cut 1/4-inch thick and toasted
Flaky sea salt, for serving

Directions: 

Step 1
Preheat the oven to 325°. In a bowl, toss the tomatoes with the garlic and 1 tablespoon of the olive oil; season with kosher salt and pepper. Transfer the tomatoes to one side of a parchment-lined baking sheet and lay the pancetta slices out on the other side. Bake for 25 minutes, until the pancetta is crisp. Transfer the pancetta to paper towels to drain, then crumble.

Step 2
Roast the tomatoes for about 10 more minutes, until bursting and lightly caramelized. Transfer the tomatoes and any rendered fat from the pancetta to a bowl.

Step 3
Meanwhile, in a small skillet, heat the remaining 1/4 cup of olive oil over moderately high heat. Add the sage and fry until bright green and crisp, 30 to 45 seconds. Drain the sage on paper towels; reserve the oil for another use.

Vietnamese Shrimp Toast Recipe – Banh Mi Tom Quet Nuong

Servings: 8
Preheat: 350
Prep Time: 
Source: http://vietnamese-cuisine.com/banh-mi-tom-quet-nuong-vietnamese-shrimp-toast-recipe/

Vietnamese shrimp toast is a great finger food that has always been a hit at parties. This savory bite on crispy French toast, eaten as is, or dipped in a little nuoc mam sauce that is a treat that no one can resist! This is another simple recipe that can be made with few ingredients but packs a flavorful punch.

Ingredients: 

1 lb raw medium shrimp (peeled, deveined, and chopped)
2 Green onion (finely chopped)
1 tsp cornstarch
½ tsp Salt
½ tsp Sugar
¼ tsp Ground black pepper
1 Egg
2 cloves of garlic
French Baguette

Ingredients for Dipping Sauce:
¼ cup nuoc mam (Vietnamese fish sauce)
¼ cup sugar
Lime juice (to taste)
Hot sauce or hot peppers (finely chopped, to taste – optional)

Garnish Suggestion:
Chopped cilantro or green onion sprinkled over the finished product.

Directions: 

Clean and chop the shrimp to a medium dice. Finely chop (mince) the green onion and garlic cloves. Both of these steps can be accomplished with a food processor if you don’t feel like chopping manually. Add the shrimp, green onion, and garlic to the rest of the ingredients in a large bowl and mix until well combined. (tip: to test the seasoning, place a small spoonful in the microwave for a about 30 seconds).

Slice the French baguette on a diagonal in pieces about ¼ to ½ inches thick. Take a small spoon and add a small amount of the shrimp mixture (or a lot, depending on how many you want to make) onto the slice of French toast and place on the baking sheet. Continue to do this until all of your shrimp mixture is gone. Make sure that when you place the toasts down you do not overlap.

Place in the preheated oven and bake for 10-15 minutes (check on them every 5 minutes or so to make sure that your oven is cooking evenly and the toasts do not burn).

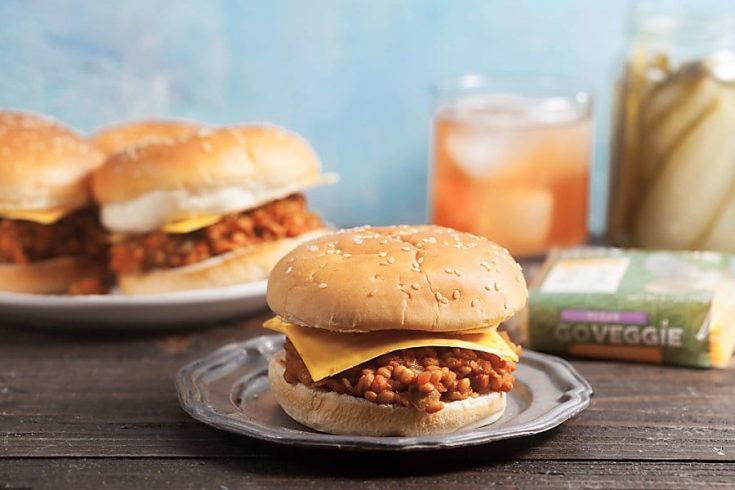
BBQ Lentil Sloppy Joes

Servings: 4
Preheat: 0
Prep Time: 
Source: https://www.healthy-delicious.com/wp-json/mv-create/v1/creations/497/print

Quick homemade barbecue sauce gives these lentil sloppy joes a ton of flavor. You can also substitute 1 1/2 cups of your favorite bottled barbecue sauce plus 1/4 cup water.

Ingredients: 

1 cup green or brown lentils
1 tablespoon olive oil
1 onion, diced
1 green bell pepper, diced
3/4 cup ketchup
1/4 cup apple cider vinegar
1/4 cup water
2 tablespoons maple syrup
1 tablespoon Worcestershire sauce*
1 tablespoon Dijon mustard
1/4 teaspoon cayenne pepper

Directions: 

Add the lentils and two cups of water to a small saucepan. Bring to a boil, then reduce heat to a simmer. Cover and cook 25 minutes, or until the water is absorbed and the lentils begin to soften.

Meanwhile, heat the oil in another pan. Add the onion and bell pepper and cook, stirring occasionally, for 5 minutes, or until softened. add the ketchup, vinegar, water, syrup, Worcestershire sauce, mustard, and cayenne pepper. Season with salt and pepper. Bring to a boil then reduce to a simmer.

Add the partially cooked lentils to the sauce and simmer 10 minutes, or until soft. Adjust cayenne, salt, and pepper to taste.