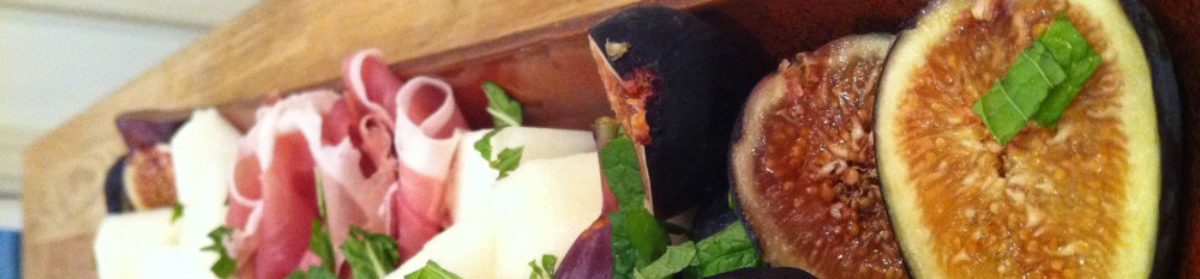
Chicken Tagine with Pumpkin and Chickpeas

Servings: 8-10
Preheat: 400°
Source: From David Tanis – A Platter of Figs
Saffron-scented North African-style chicken tagine is a wonderful stew, perfect for a small group, comforting on a cold night. In Tunisia and Morocco, tagine is both the name of the cooking vessel and the dish. Basically, a deep thick earthenware plate is filled with meat and vegetables or dried fruit. A high conical lid keeps the moisture in, allowing the dish to simmer, sizzle, and bake, on a propane stovetop or over hot coals. The tagine is a clever device, economical in a land where the price of fuel is high and most homes do not have ovens. Similar results can be achieved in an American oven using a wide shallow casserole or gratin dish. This tagine can be made hours (or a day) before serving, and then is easily reheated. The recipe is easy to alter for other seasons (it’s wonderful with tomatoes in place of pumpkin).

Ingredients
FOR THE CHICKPEAS
1 lb (2 cups) dried chickpeas, picked over and soaked overnight in cold water
1 lg onion, quartered
1 cinnamon stick
A few cloves Olive oil Salt
Butter
Pinch of ground cinnamon
Chopped parsley

FOR THE TAGINE
About 4- lb pumpkin or winter squash, seeds and membranes removed
Salt and pepper
12 lg whole chicken legs (with thighs)
A 3″” piece of ginger, peeled and grated
2 tsp cumin seeds, lightly toasted and roughly ground
4 lg onions, diced sm
2 Tbsp olive butter
6 garlic cloves, sliced
Large pinch of saffron
Red pepper flakes or cayenne
oil
2 Tbsp

Harissa oil
makes about 1 cup
This is a fragrant, spicy, ruddy-colored oil, to be drizzled over any number of things-olives, eggs, vegetables, toasted bread, or chicken stew.
1 Tbsp cumin seeds
1 Tbsp coriander seeds
1 tsp caraway seeds
1 tsp fennel seeds
3 Tbsp sweet paprika or mild ground red chile
1 tsp cayenne or other powdered hot red chile
1 to 2 garlic cloves, smashed to a paste with a little salt
1 tsp salt
1 cup olive oil
A few drops of red wine vinegar

Directions
To cook the chickpeas, drain them, put in a saucepan, and cover with 3 quarts of water. Add the onion, cinnamon stick, cloves, a splash of olive oil, and a little salt. Bring to a boil, then simmer gently uncovered, for about an hour, or until the chickpeas are tender. Taste for salt and adjust. Leave the chickpeas to cool in the cooking liquid.

For the tagine, cut the pumpkin or winter squash into thick slices and spread them on a flat surface. Season the slices with salt and pepper.

Season the chicken legs generously with salt and pepper. Massage them with the grated ginger. Sprinkle the cumin seeds over the meat. Set the chicken aside.

Preheat the oven to 400°F. In a skillet over medium heat, sauté the diced onions in a combination of butter and olive oil until softened. Season with salt and continue cooking until the onions are lightly golden, about 10 minutes. Turn off the heat and add the sliced garlic cloves. Crumble the saffron over the onions. Stir the onions and season to taste with red pepper.

Arrange the onions in a shallow earthenware casserole (or two if necessary), then top with the pumpkin slices. Now put chicken legs over the pumpkin in one layer, skin side up. Add 3 to 4- cups of chickpea cooking liquid, barely covering the chicken.

Cover the casserole and bake for 20 minutes or so, until the liquid is bubbling briskly. Reduce the heat to 375°F and continue cooking for another 30 minutes, or until the chicken legs yield easily to a probing fork. Take the casserole from the oven and remove the chicken legs. Skim any surfacing fat with a shallow ladle.

Replace the chicken legs and return the dish to the oven, uncovered. Bake until the juices are bubbling and the chicken legs are lightly browned, about 20 minutes.

Warm the chickpeas in their cooking liquid, then drain and deposit them in a warmed bowl. Swirl in a little butter, the cinnamon, and some chopped parsley.

Serve each diner a chicken leg with some pumpkin and good ladle of broth. Spoon some chickpeas over each serving. Pass a bowl of the spicy harissa oil for drizzling.

Make Harissa Oil. Toast all the seeds in a dry pan over medium heat until they are fragrant. Grind the toasted seeds in a mortar or spice mill, then put them in a bowl.

Add the paprika, red pepper, garlic, and salt. Stir in the olive oil and vinegar. The harissa will keep in the fridge for up to a week.

Chicken Pie with Biscuit Crust

Servings: 4
Preheat: 450°
Source: Gourmet, January 1991

Ingredients
For the filling
4 cup chicken broth
3 carrots, cut crosswise into ¼”” slices
¾ lb red potatoes, quartered lengthwise and cut crosswise into 1/2″” pieces
2 lg ribs of celery, cut crosswise into ½”” pieces
2½ cup cubed cooked chicken (the meat from a 3 lb chicken)
1 onion, chopped
¾ stick (6 Tbsp unsalted butter
6 Tbsp all-purpose flour
¼ tsp dried thyme, crumbled
¼ tsp freshly grated nutmeg, or to taste
½ cup minced fresh parsley leaves

For the biscuit crust
1 1/3 cup all-purpose flour
1½ tsp double-acting baking powder
½ tsp baking soda
½ tsp salt
2 Tbsp cold unsalted butter, cut into bits
2 Tbsp cold vegetable shortening, cut into bits
1/3 cup grated sharp Cheddar
1 lg egg
about 1/3 cup buttermilk
an egg wash made by beating 1 lg egg yolk with 1 Tbsp milk

Directions
Make the filling:

In a saucepan bring the broth to a boil, add the carrots, the potatoes, and the celery, and simmer the vegetables, uncovered, for 10 to 15 minutes, or until they are tender.

Transfer the vegetables with a slotted spoon to a large bowl, reserving the broth, and add the chicken to the bowl. In another saucepan cook the onion in the butter over moderately low heat, stirring, until it is softened, add the flour, and cook the roux, stirring, for 3 minutes. Add 3 cups of the reserved broth in a stream, whisking, reserving any remaining broth for another use, and bring the mixture to a boil, whisking. Add the thyme and simmer the sauce, stirring occasionally, for 5 minutes. Stir in the nutmeg, the parsley, and salt and pepper to taste, pour the sauce over the chicken mixture, and stir the mixture gently until it is just combined. Transfer the mixture to a 2-quart shallow baking dish or divide it among four 2-cup shallow baking dishes. The filling may be made 1 day in advance and kept covered and chilled. Bring the mixture to room temperature before continuing with the recipe.

Make the biscuit crust:

Into a bowl sift together the flour, the baking powder, the baking soda, and the salt, add the butter and the shortening, and blend the mixture until it resembles meal.

Add the Cheddar and toss the mixture. Into a liquid measuring cup break the egg, add enough of the buttermilk to measure a total of ½ cup, and beat the mixture with a fork. Add the egg mixture to the flour mixture, stirring until the mixture just forms a dough, gather the dough into a ball, and on a floured surface pat it out ½ inch thick. Cut out as many rounds as possible with a 2-inch fluted round cutter dipped in flour, gathering the scraps and patting the dough out again in the same manner.

Arrange the rounds on the chicken mixture, brush the tops of the rounds with the egg wash, and prick the rounds with a fork. Bake the pie in the middle of a preheated 450°F oven for 15 to 25 minutes, or until the biscuits are puffed and golden and the filling is bubbling.

Chicken Marsala with Pancetta & Cream

Servings: 2
Source: Fine Cooking Dec 2000/Jan 2001 last page
Chicken Marsala-a classic chicken cutlet preparation- is a main dish that’s ready literally in minutes. And while I’ve always liked chicken Marsala well enough — the cutlets get coated lightly with flour, sautéed, and the pan is deglazed with Marsala wine to make a sauce — it sometimes feels a little too one-dimensional. To jazz up this classic dish, I’ve added pancetta and a little cream. Both are quick additions, but they result in a richer, more deeply flavored dish.

You can buy packaged skinless, boneless chicken breasts that are already sliced very thin. If you don’t see any in the butcher’s case, ask the butcher to slice the chicken breasts for you. I often ask at supermarkets, and it’s never been a problem. (Of course, you can slice the chicken breasts yourself, but it will take you a few minutes.)

Pancetta is Italian bacon that, unlike American bacon, is not smoked. You used to have to go to an Italian deli or a specialty food store to find pancetta, but now it’s available in most supermarket delis. If you don’t see it, ask for it. I like to buy a thick slice and dice it myself, but sometimes you’ll find already packaged pancetta sliced very thin. That will work fine, too, and it will cook even faster.
After frying the pancetta, reserve the fat to cook the chicken breasts in — another flavor boost. And don’t forget to season the chicken before you flour it. Because the pancetta adds its own salty flavor, go light on the salt, but use ample freshly ground black pepper.

For the quickest dinner, serve the chicken with sautéed spinach and crusty bread. It’s also great with mashed potatoes and green beans blanched and then sautéed until browned in spots.

You can buy thin cutlets or ask your supermarket butcher to cut some for you. This recipe is easily doubled, but you’ll likely need to cook the chicken in batches.

Ingredients
Olive oil
2 oz. pancetta (about a ¼-inch thick slice), cut into a ¼-inch dice
Flour for dredging (about ½ cup)
4 thin chicken breast cutlets, about ½ lb. total
Coarse salt
Freshly ground black pepper, preferably on the coarse side
½ cup dry Marsala wine
2 to 4 Tbs. heavy cream
Minced fresh flat-leaf parsley (optional)

Directions
Coat a large skillet lightly with olive oil and set it over medium-high heat. Add the pancetta and cook until just crisp and lightly browned. Remove with a slotted spoon – leave the fat in the pan – and set aside.

Put the flour on a plate. Pat the cutlets dry. Season them on both sides lightly with salt and amply with pepper. Heat the skillet with the pancetta fat over medium high. Add more olive oil, if needed, to get about 2 Tbs. fat in the pan.

When the fat is hot, dredge a cutlet through the flour on both sides. Shake off the excess flour and immediately put the cutlet in the pan. Do the same with as many cutlets as will fit in the pan without touching. Sauté the cutlets, turning once, until browned on both sides; if thin, they should cook through in just a few minutes total. Transfer the cooked cutlets to a plate and continue sautéing the rest, adding more oil if necessary. Transfer these to the plate as well.
Pour off the excess fat. With the pan over medium-high heat, add the Marsala and scrape up any browned bits from the bottom of the pan. Cook until the Marsala is reduced by about a quarter. Stir in the cream and boil until you get a nicely thickened sauce. Return the chicken and pancetta to the pan and turn the cutlets over to coat. Let them reheat for 30 seconds to 1 min. Serve with the sauce and a sprinkling of parsley, if you like.

Chicken Alla Cacciatora

Servings: 4
Source: The Classic Italian Cookbook by Marcella Hazan
recipeNotes: If prepared ahead of time, let the chicken cool in its sauce. When reheating, simmer very slowly, covered, for a few minutes, just until the chicken is hot.

Ingredients
Frying chicken (2 ½ to 3 lb), cut into 4 to 6 pieces
3 Tbsp vegetable oil
1 cup all-purpose flour, spread on a dinner plate or on waxed paper salt
Freshly ground pepper, 4 to 6 twists of the mill
2/3 cup dry white wine
1/3 cup thinly sliced yellow onion
1 green pepper, with seeds removed, cut into thin strips
1 med carrot, sliced very thin
½ stalk celery, cut into thin strips
1 clove garlic, peeled and chopped very fine
2/3 cup canned Italian tomatoes, coarsely chopped, with their juice

(Note, I usually put more veges in)

Directions
1. Wash the chicken pieces in cold running water and pat dry very thoroughly with paper towels.

2. Choose a skillet large enough to contain all the chicken pieces comfortably, without crowding. Heat the oil in the skillet over moderately high heat. Turn the chicken pieces in the flour, coating both sides and shaking off the excess, and put in the skillet, skin side down. When one side has turned golden brown, turn the pieces over and brown the other side. When nicely browned on all sides, transfer them to a warm platter and add salt and pepper.

3. Tip the skillet and draw off most of the fat with a spoon. Turn the heat to high, add the wine, and boil rapidly until it is reduced by half. Scrape up and loosen any cooking residue in the pan. Lower the heat to medium, add the sliced onion, and cook for about 5 minutes, stirring two or three times- Add the browned chicken pieces, -II but the breasts. (Breasts cook faster, so they can be added later.) Add the sliced pepper, carrot, celery, garlic, and the chopped tomatoes and their juice. Adjust to a slow simmer and cover. After 9 to 10 minutes add the breasts and continue cooking until tender, about 30 minutes. Turn and baste the chicken a few times while cooking.

4. Transfer the chicken to a warm serving platter. If the sauce in the pan is too thin, raise the heat to high and boil it briskly until it thickens, stirring as it boils. Pour the sauce over the chicken and serve immediately.

Pickled Cabbage, Thai Style

Servings: —
recipeNotes: NOTE: You can make a quick and easy stir-fry with pickled cabbage. Heat 2 tablespoons oil in a wok and toss in 3 dried red chilies and 1 tablespoon minced garlic. Then the garlic begins to change color, toss in 2 cups drained, coarsely chopped cabbage. Stir-fry for about 2 minutes, until wilting, then season with 1 tablespoon Thai or Vietnamese fish sauce or 7 teaspoon salt. Stir briefly, turn out onto a plate, and serve. This makes an excellent foil for mild or rich dishes, such as coconut milk-based curries or soups. In Issaan it’s called pak som pad, in Laos, khoua Pak
pak kat dong THAILAND]

Unlike many pickles, this slightly sweet, intense version of pickled cabbage doesn’t make you wait for weeks. Two days after it goes into the jars, it’s ready, still slightly crunchy and bursting with flavor. Over time, the cabbage softens and the flavors mellow. This makes a good addition to a vegetable plate or, finely chopped, a kind of chutney/pickle condiment to accompany any rice or noodle meal. Or stir-fry it as an accompaniment for a rice meal (see Note.)

Ingredients
1 medium Savoy cabbage (about 21/2 pounds), or 21/2 pounds Swatow mustard greens
2 cups rice vinegar
1 cup sugar
2 tablespoons kosher salt

Directions
Peel off and discard any discolored leaves, then cut the cabbage lengthwise in half. Cut out the core and discard. Cut the cabbage into thin wedges, then cut crosswise into approximately 2 -inch pieces. (If using the greens, cut into roughly rectangular pieces about I by 2 inches.) Spread out on a tray or basket in a warm or sunny place, cover loosely with a white cotton cloth, and let wilt for 6 to 12 hours.

Place the remaining ingredients in a nonreactive pot and bring to a boil. Let cool to room temperature.

Meanwhile, sterilize two I -pint glass canning jars and their lids. Stuff the cabbage into the sterile jars, using sterile tongs. Pour the vinegar mixture over to cover, then seal tightly. Let stand for 2 days at room temperature (or, if the weather is very hot, in a cool place) before using. Store in the refrigerator. Use within 3 weeks.

Makes 2 pints pickled cabbage

Chiang Mai Curry Noodles

Servings: 4
Khao Soi-NORTHERN THAILAND

We’re told by friends in Chiang Mai, Thailand’s northern capital (see Chiang Mai, page 122), that this noodle dish is originally from the Shan State of Burma; others say it came with Muslim traders from Yunnan. Whatever the story, khao soi is now known as a Chiang Mai specialty. It’s an easy-to-make, very rich and delicious one-dish meal.

The broth that bathes the noodles is flavored with a little curry paste, turmeric, and garlic and is smooth and thick with coconut milk. Traditionally khao soi is made, as it is here, with beef; you can also make it with chicken.

The recipe calls for Chinese egg noodles, available from most Chinese groceries. They come in one-pound packages and are about lingaine width and pale yellow. The cooked noodles are placed in large individual bowls and the curry sauce is poured over them when the dish is served. Khao soi is usually topped with a small nest of crispy noodles, egg noodles that have been briefly deep-fried; they add a delightful contrasting texture. There is a small array of condiments traditionally served with khao soi; don’t worry if you don’t have pickled cabbage.

Ingredients
2 to 3 cloves garlic, peeled
1″” piece fresh turmeric, minced, or 1 tsp ground turmeric
I tsp salt, plus a pinch
1 Tbsp Red Curry Paste (page 210 or store-bought)
1 Tbsp peanut or vegetable oil
3 cup canned or fresh coconut milk (see page 315), with ½ cup of the thickest milk set aside
½ lb boneless flavorful beef (sirloin tip or trimmed stewing beef), cut into ½”” chunks
1 Tbsp sugar
1 cup water
3 Tbsp Thai fish sauce
1 Tbsp fresh lime juice
Peanut oil for deep-frying noodles (optional)
1 lb Chinese egg noodles (bamee)

TOPPINGS AND CONDIMENTS
Fried noodle nests (optional; see below)
½ cup coarsely chopped shallots
½ cup minced scallions
½ cup Pickled Cabbage, Thai Style (page 311 or store-bought)
1 lime, cut into wedges

Directions
Place the garlic in a mortar with the turmeric and the pinch of salt and pound to a paste. Alternatively, finely mince the garlic and whole turmeric, if using, and place the garlic and turmeric in a small bowl with the pinch of salt. Stir in the red curry paste and set aside.

Place a large heavy pot or wok over high heat. Add the 1 tablespoon oil and, when it is hot, toss in the curry paste mixture. Stir-fry for 30 seconds, then add the reserved ½ cup thick coconut milk and lower the heat to medium- high. Add the meat and sugar and cook, stirring frequently, for 4 to 5 minutes, until the meat has changed color all over. Add the remaining 2½ cups coconut milk, the water, fish sauce, and the remaining 1 teaspoon salt and bring to a boil, then reduce the heat to medium and cook at a strong simmer for about i o minutes. Remove from the heat and stir in the lime juice. (The soup can be prepared up to an hour ahead, then reheated just before serving.)

Meanwhile, make the optional crispy noodles: Place a plate lined with several layers of paper towels by your stove. Place a large wok or heavy pot over high heat and add about 1 cup peanut oil, or 1/2 inch oil. When the oil is hot, drop in a strand of uncooked noodle to test the temperature. It should sizzle slightly as it falls to the bottom, then immediately puff and rise to the surface; adjust the heat slightly, if necessary. Toss a handful (about 1 cup) of noodles into the oil and watch as they puff up. Use a spatula or long tongs to turn them over and expose all of them to the hot oil. They will crisp up very quickly, in less than 1 minute. Lift the crisped noodles out of the oil and place on the paper towel-lined plate. Give the oil a moment to come back to temperature, and then repeat with a second handful of noodles. (The noodles can be fried ahead and left standing for several hours.)

To serve, bring a large pot of water to a vigorous boil over high heat. Drop in the remaining noodles (or all noodles, if you didn’t make crispy noodles), bring back to a boil, and cook until tender but not mushy, about 6 minutes. Drain well.

Divide the drained noodles among four large bowls. Ladle over the broth and meat. Top with crispy noodles, if you have them, and a pinch each of shallots and scallions. Serve with the remaining condiments set out in small bowls so guests can garnish their soup as they wish. Provide each guest with chopsticks and a large spoon.

Chewy Brownies

Servings: 16
Added flour helps to give these brownies their chewiness. It’s important not to over bake these or they’ll dry out.

Ingredients
4 oz (8 Tbs.) unsalted butter; more for the pan
4 oz unsweetened chocolate
1 ½ cup sugar
Scant ¼ tsp salt
2 tsp vanilla extract
2 lg eggs, at room temp
4 ½ oz (1 cup) flour
2 Tbsp natural cocoa (not Dutch-processed)

Directions
Position an oven rack on the middle rung. Heat the oven to 350°F. Butter an 8-inch square pan, line the pan bottom with parchment (or waxed paper), and then butter the parchment. In a double boiler over simmering water, melt the butter and chocolate. Remove the pan from the heat; cool slightly. Stir in the sugar, salt, and vanilla. Mix in the eggs, one at a time, stirring each time until blended. Add the flour and cocoa; beat until incorporated and the mixture is smooth, 30 to 60 seconds. Scrape the batter into the prepared pan and bake until the top is uniformly colored with no indentation and a toothpick inserted in the middle comes out almost clean, with a few moist crumbs clinging to it, 35 to 45 min. Set the pan on a rack until cool enough to handle. Run a paring knife around the inside edge of the pan and then invert the pan onto a flat surface and peel off the parchment. Flip the baked brownie back onto the rack to cool completely. Cut into squares with a sharp knife.

Yields sixteen 2-inch squares.

Charred Corn Salad

Servings: —

Ingredients
3 – 4 ears fresh corn
1/2 cup cherry tomatoes halved
1/2 cup red onion in 1/4″” slices
2 Tbsp chopped cilantro
2 Tbsp Dijon mustard
1/4 tsp ground cumin
4 Tbsp olive oil
2 Tbsp cider vinegar
salt/pepper
1 Tbsp garlic

Directions
Roast corn over grill or boil for 10 minutes. Cut kernels from ears and place in bowl. Carefully grill sliced onions until just browned (it helps to put onions in a grill basket or else they will fall through grate). Add tomatoes, onions and cilantro. Whisk remaining ingredients together for dressing. When ready to serve, add dressing to taste.

Celery Root Salad (Remoulade)

Servings: —
Source: Coke Farm

Ingredients
1 lg or two sm celery roots
1 lemon, juiced
1 Tbsp mayo, or to taste
1 tsp dijon mustard
2 Tbsp vinegar (rice or white wine)
3 Tbsp oil (sunflower, walnut)
Salt and pepper to taste

Directions
Peel, wash and grate celery root and immediately drizzle with lemon juice to prevent oxidation.

Add mayo, mustard, vinegar, oil, salt, pepper, and stir.

Will keep in refrigerator for 2-3 days. This salad has a refreshing flavor and goes very well with fish.

P.S. Celery root is delicious cubed in soups and stews. When I prepare mashed potatoes, I sometimes substitute some celery root for potatoes. It gives the dish a sweet, nutty flavor

Catalan Mushrooms with Garlic & Parsley

Servings: 6
Source: Fine Cooking, September 2001
Serve these as a starter or perhaps as an accompaniment to the baked chicken. Leftovers are great on pizza or added to pasta sauce.

Ingredients
1 lb medium-size white mushrooms, stems trimmed to ½ inch, and quartered
¼ cup extra-virgin olive oil
¼ cup finely chopped flat-leaf parsley
2 Tbsp finely chopped fresh garlic
1 to 2 tsp coarse salt or sea salt

Directions
Put the mushrooms in a large bowl of cold water to soak for 1 0 min. Rinse them well and then drain.

Heat a large sauté pan with a tight-fitting lid over medium heat. Add the drained mushrooms to the dry pan, cover immediately, and cook until all the moisture from the mushrooms is leached out, about 20 min. You’ll know this has happened when you lift the lid for a peek and see the once-dry pan filled with liquid.

Remove the lid, raise the heat to medium high, and boil until the liquid evaporates and the mushrooms begin to sizzle in the dry pan but haven’t browned; they’ll have shrunk considerably and should be firm when poked with a fork. Lower the heat to medium and stir in 1 Tbsp of the olive oil, the parsley, and the garlic. Sauté, stirring frequently until the garlic softens, another 3 to 4 min. Transfer the mushrooms to a serving bowl, stir in the remaining 3 Tbsp olive oil, and season with salt to taste (I like to salt them liberally). Serve while hot.